Monday, 4 November 2013

Screen printing!

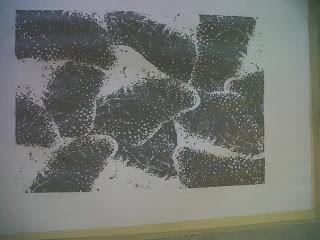
Ready to be exposed (printed onto acetate)
 
 
This is one of the images I have decided to put on a screen, along with an 'inverted' version to make a two colour-way print that slots together, I have also made a smaller screen capturing the dots so I can layer up more detail, potentially with foils.
 
 
Process
 
 
This is an image taken whilst my screen was being exposed, I have coated my own screen and exposed it for the first time. (I love how at this college you have the freedom to make your own screens whenever you want... you can get on with screen-printing as soon as you're images are ready)
 
 
Binder
 
 
Coloured inks (add a tiny drop at a time)
 
 
Trying to achieve the colours from my colour story (Very hard!)


Making the printing inks...

As this is the first time I have had to make my own inks I have chosen to start with the basics... mixing the binder with the colour and ironing it to fix it once its dried.
I plan to experiment further with dying fabrics and using the pigment and acid pastes.
 
 
Pinned and prepared fabric
 
 
 It is VERY important to pin or tape down the fabric when screen printing, especially with my prints as they need to line up exactly with each other.


Immediately after being printed
 
  
Collection of dried samples
 
 
These are some of my samples so far.
I am now focusing on adding foils to my prints, and plan to have digitally printed material by the end of the week that I can work into with some of these screen prints.


No comments:

Post a Comment

Mono-Printing

Mono-Printing


These are some of the mono-prints i created during my last module, I firstly began by drawing trees and twigs, but then began looking closer into the knots and roots of the tree's which i think are much more interesting.

Natural fashion

Natural fashion


This is something I created during my time at Sunderland University, it was part of my open brief module where i decided to create fashion which was 'natural' . I later went on to dye my own fabrics with berries, flowers and leaves and created a very unique, yet wearable scarf.

Futuristic module.

Wearable art


As part of my futuristic module we were asked to create a piece of wearable art. With inspration from lady gaga and the latest jewellery craze (body necklaces) i have created this body necklace made out of silicone and beads that is inter-changeable and multi-functional. I have also created two more panels for the necklace. The idea behind using silicone came when i was trying to make my own material and experimenting with a range of versatile products and found that silicone was the most flexible and appropriate for this type of use.

Decon/recon workshop

Gold faux leather jacket...

Original jacket

Original jacket

Deconstructed jacket

Deconstructed jacket

Final reconstruction piece

Final reconstruction piece

Zip + Cuff necklace

Zip + Cuff necklace
We were given a workshop called decon/recon where we had to deconstruct a once wearable garment and then reconstruct it into something new.The theme of this module was Futuristic so off i headed to the local charity shop to find this gold biker jacket that i thought fitted the theme quite well.I am concentrating on making a piece of wearable art for my final piece so i decided to make a neck piece out of this jacket.First of all i deconstructed the whole jacket using an unpicker and scissors and seperated the different components into piles. Then i experimented with all of the zips and cuffs to construct one long necklace. However i didnt find this necklace very interesting and basic.So i started experimenting with the faux leather pieces and how they would react in the heat presser. i learnt that the material would fuse together when folded and create a lovely two tone effect.I began folding two long strips of the faux leather into a necklace shape and then fused it with the heat press to secure it.Once i had the base i started to add the details:I made buttons by fusing the small scraps like threads and cut off's together then cut out circles.I then cut out more circles of the faux leather and folded them then stitched them into a roll shapes.Then i attatched the buttons and ruffled circles as well as both of the pocket zips (opened) using a leather needle and white thread.

Something quite similar on the high street!

Something quite similar on the high street!
I found this laser cut collar in Topshop which i think is very cute!